Install NVIDIA CUDA on an AWS Ubuntu g4dn server
Nvidia CUDA Installation steps on a new AWS Ubuntu 18.04 g4dn server
NVIDIA CUDA installation is required to work with NVIDIA GPUs. If you are working on machine learning projects, installing CUDA for your GPU enabled server is a necessary first step.
Lets see how to install CUDA in a GPU enabled server.
Check for GPU
Lets first check if your server has a GPU
lspci | grep -i nvidia
If your server has a GPU you should get a response like this.

If nothing comes back from lspci command, then update the PCI hardware database of linux by entering update-pciids command and rerun the lspci |
grep command. |
Check system compatablity
Check for the CUDA supported version of linux
CUDA needs a 64 bits system
uname -m && cat /etc/*release
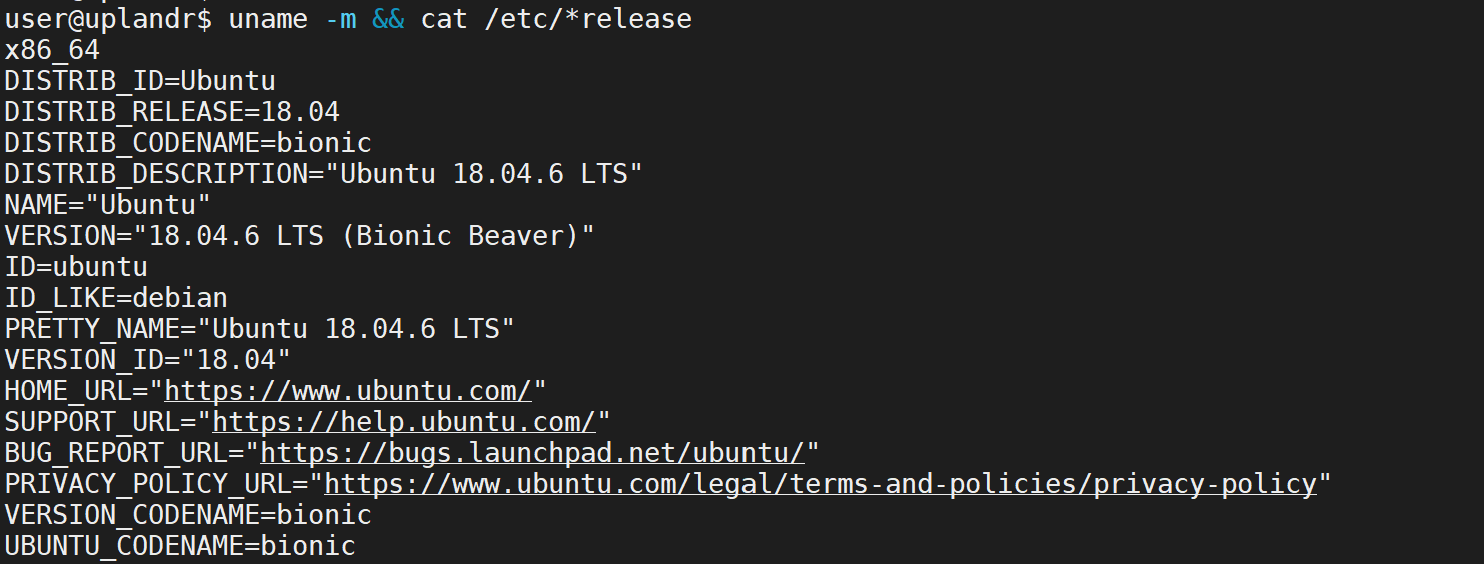
It is a 64 bits system
GCC installation
Verify that gcc is installed
gcc --version
In my system gcc is not installed. So I will execute following commands to install gcc
sudo apt update
sudo apt install build-essential
The command installs a bunch of new packages including gcc, g++ and make.
You can check the gcc versions now

You may also install manual pages for using GNU/Linux for development
sudo apt-get install manpages-dev
Kernel header
Before installing CUDA, the kernel header and development package of the same kernel version need to be installed.

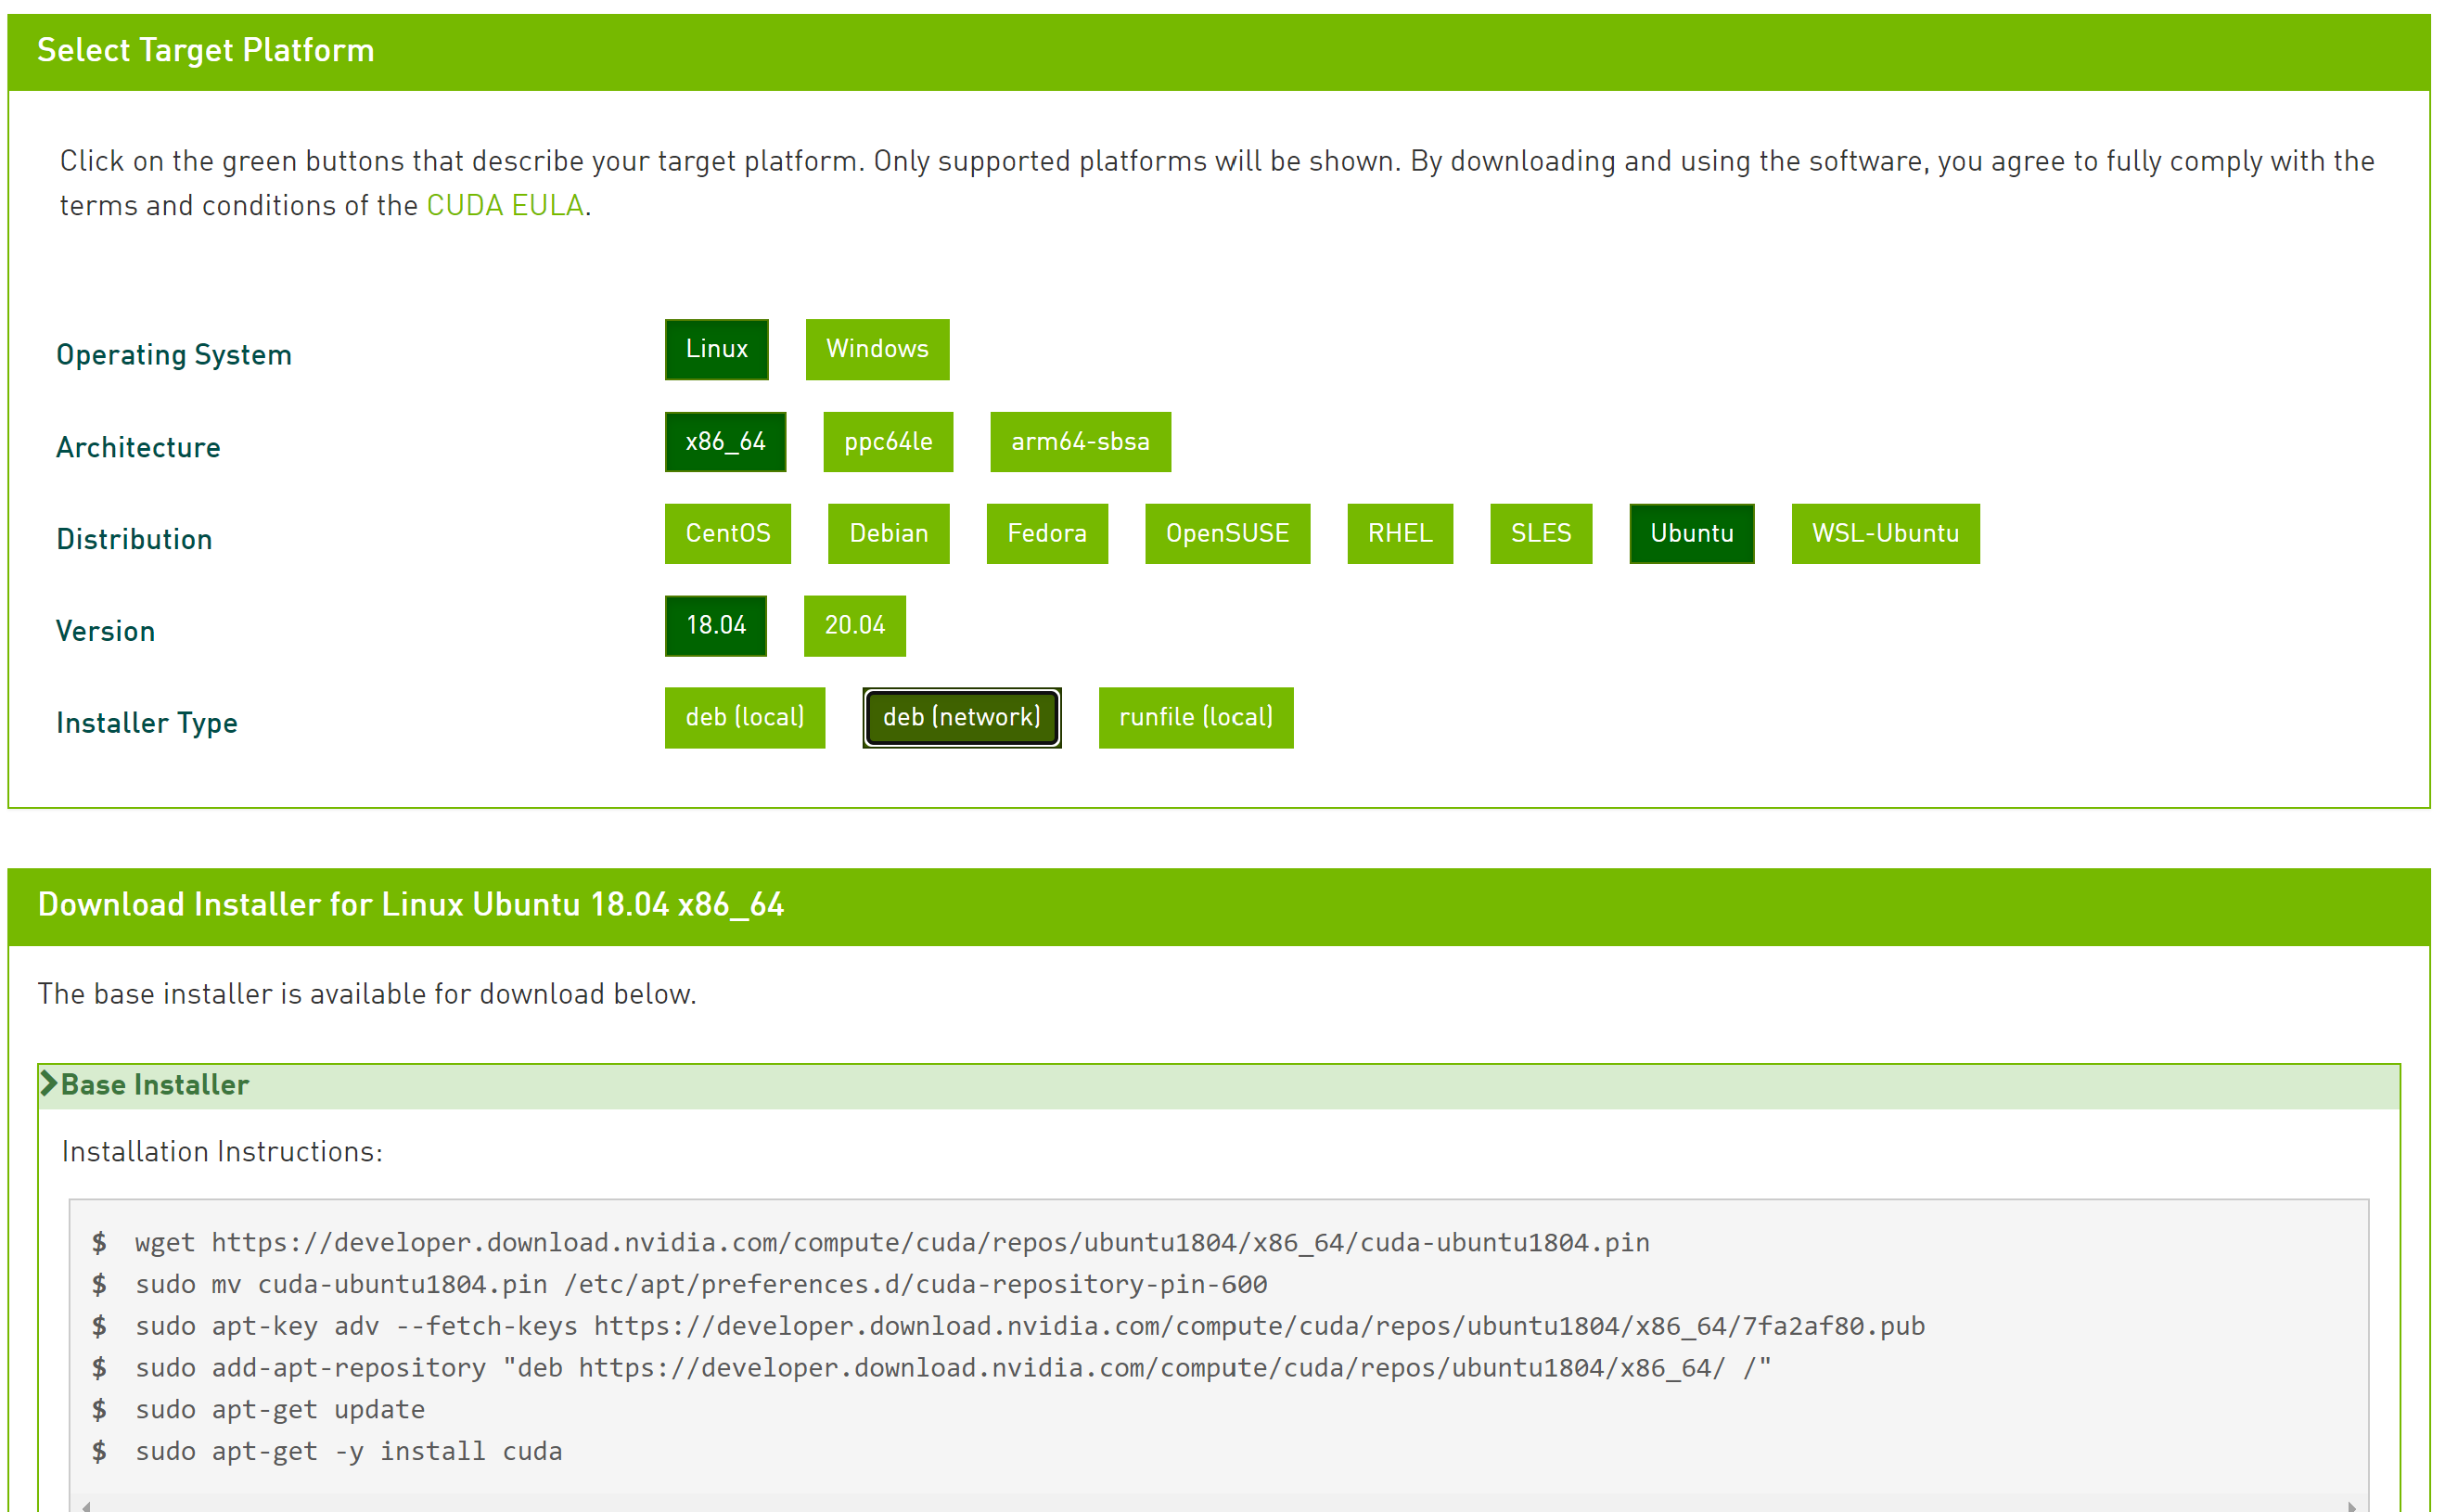
Install Cuda
Install CUDA by going to this link and selecting right choices: https://developer.nvidia.com/cuda-downloads?target_os=Linux
Reboot system after installation instructions are followed
sudo reboot now
Check CUDA version
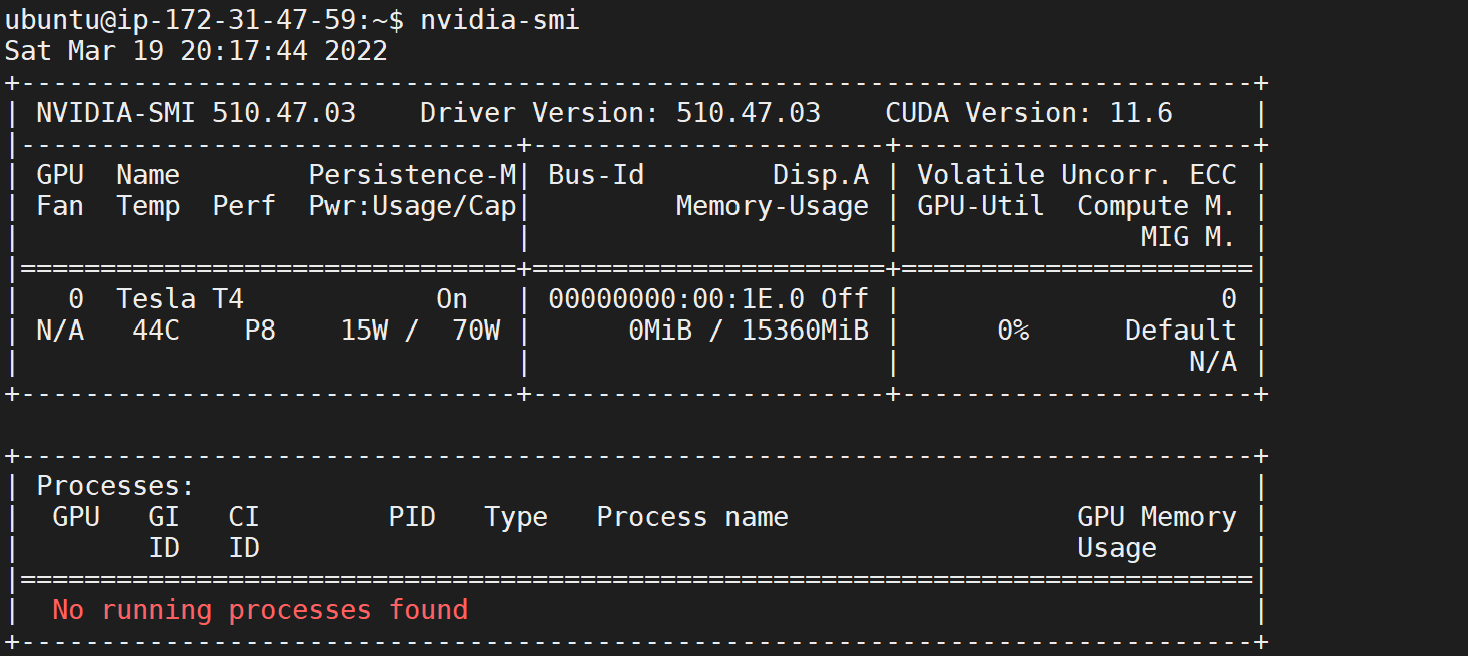
CUDA is successfully installed and the version is 11.6